
Sizing Guide
Why “Medium” Isn’t Enough: A Free Clothing Size Chart Generator
By 6Six Needles Team

They love the shirt. The color works. The graphic feels right. They’re already picturing where they’ll wear it.
Then they reach the size selector.
Small. Medium. Large.
Their thumb stops. The last medium they ordered was tight across the shoulders. The one before that could have passed for a sleep shirt. Is this brand’s medium going to be any different?
If you sell clothing online, this is the question your product page needs to help answer.
A clear size chart gives shoppers something useful to compare before they choose. And creating one shouldn’t become another design project on your already crowded to-do list.
That’s why we built the Clothing Size Chart Generator & Size Converter in the 6Six Needles Toolbox. It helps brands organize their measurements and shoppers compare supported sizing systems. We’re not charging people to use it. No account required.
Open the free clothing sizing tool.
The sizing question behind “What size should I order?”
You’ve photographed the new drop, checked inventory, written descriptions, and scheduled the announcement. Then the messages start.
“Does this run small?”
“Is the chest measurement all the way around?”
“I normally wear a UK 12. Which one should I get?”
Each question points to information the shopper needs before deciding. A size label alone can’t explain a boxy cut, a longer body, or room for layering.
The same medium can fit differently across brands and across products from one brand. A heavyweight streetwear tee and a fitted boutique top may share a letter while having very different proportions.
Add unfamiliar size systems, inches versus centimeters, and vague measuring instructions, and even an interested shopper has homework to do.
Clearer information gives that shopper a better starting point. It also gives your team a consistent reference when the next sizing question lands.
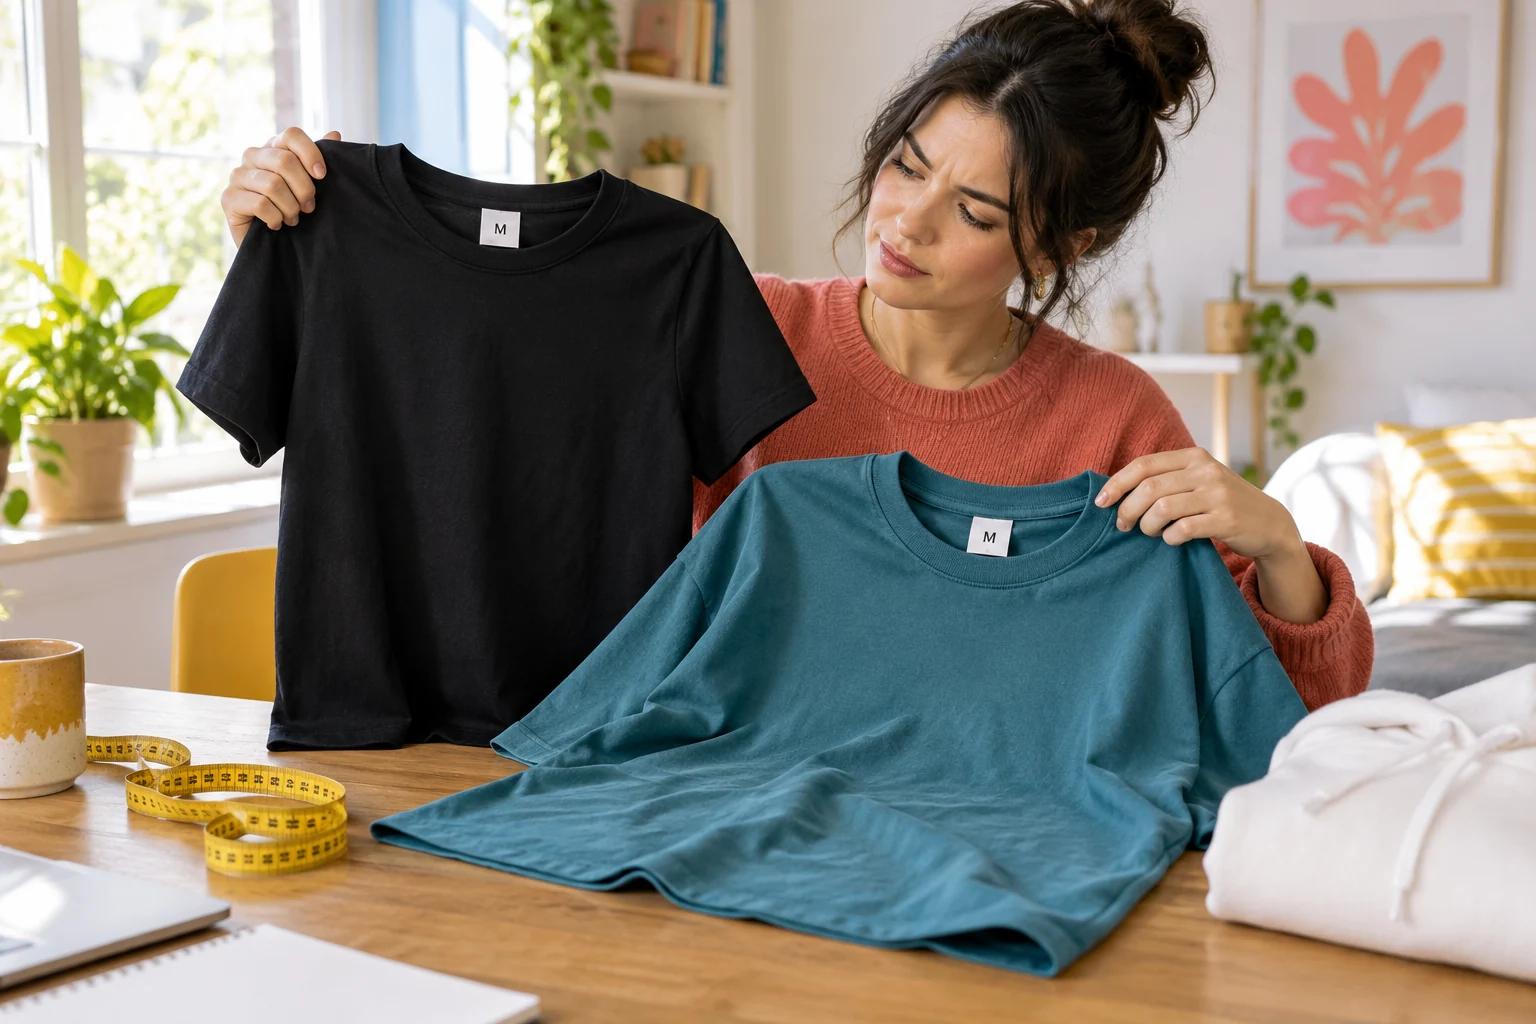
Illustrative scene: two medium labels can describe different cuts and proportions.
A size chart generator and a clothing size converter do different jobs
Our tool puts both options on one page, with separate tabs.
Build a Size Chart: organize your product’s measurements
The generator is for clothing brands, online boutiques, merch sellers, and anyone preparing size information for a product.
Choose a garment template, enter your measurements, and review the chart as you work. You can edit size labels and measurement names, add or remove sizes and rows, and include a brand name, product name, fit description, and note.
Available starting templates include T-shirts and tops, hoodies and sweatshirts, jackets, pants, jeans, shorts, dresses, skirts, kids apparel, and a custom chart.
The page offers PNG, PDF, and CSV downloads, plus Copy Table and Copy HTML options.
Convert a Size: compare a familiar size with another system
The converter helps when the label you recognize differs from the one you’re shopping with.
It has Women, Men, and Kids options. The garment categories and available systems change with your selection. Women’s numeric conversions include US, UK, and EU sizing; men’s options include casual tops and tailoring; kids’ options include height and regional labels.
Use the generator when you have product measurements to present. Use the converter when you need a general comparison between the supported sizes.
How to create a clothing size chart with the live tool
Have your sample measurements ready, then open the generator and select Build a Size Chart.
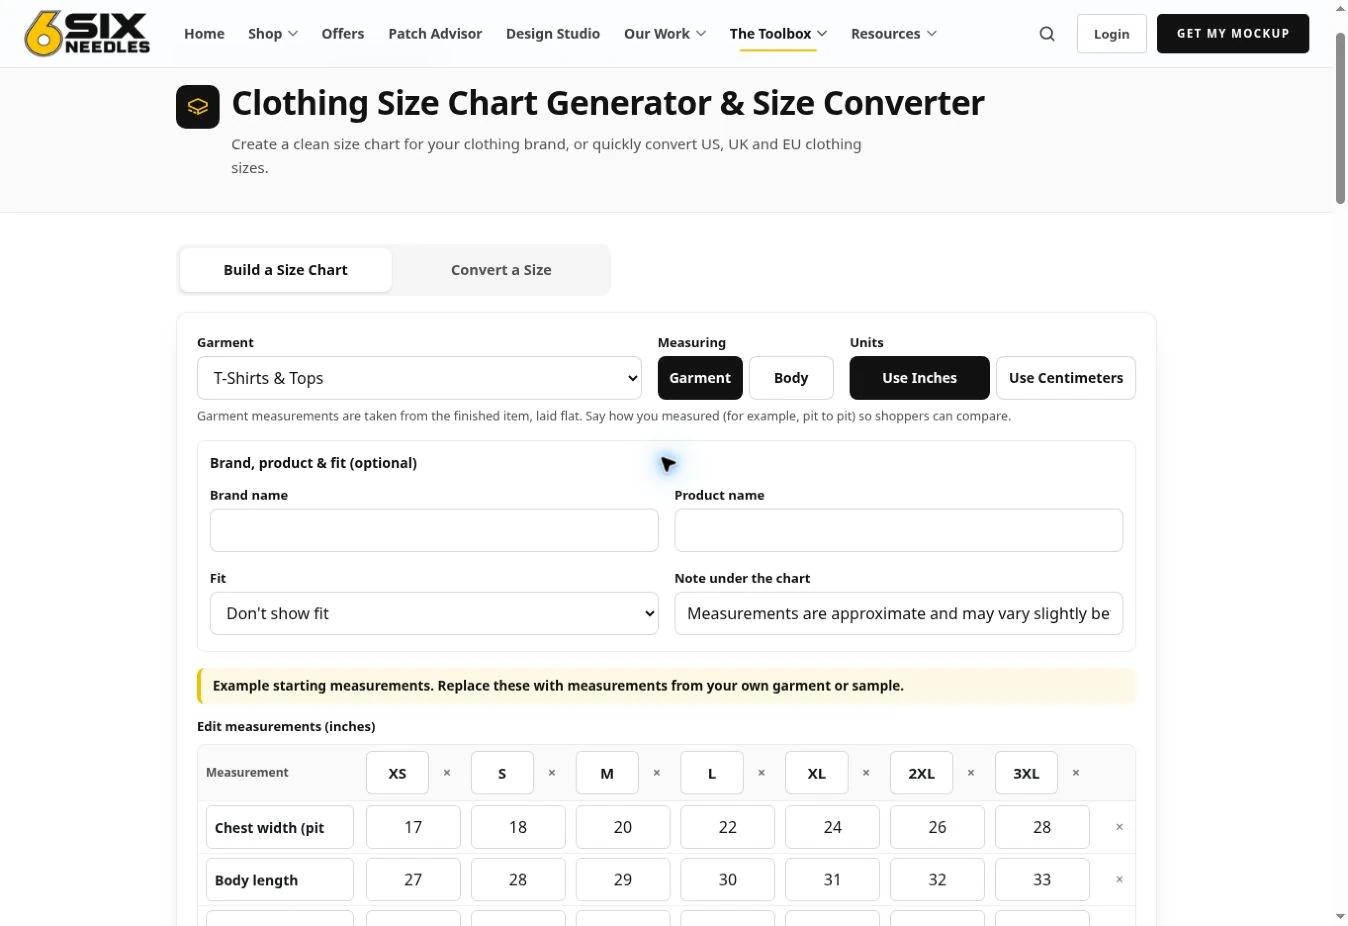
Choose the garment, measurement type, and units before entering your own sample measurements.
1. Choose the garment you’re selling
For a tee, select T-Shirts & Tops. For a sweatshirt or hoodie, choose Hoodies & Sweatshirts.
The template supplies starting rows and example numbers. Those numbers are placeholders to replace with your own verified measurements. They aren’t specifications for your clothing.
Start with a separate chart for each cut or blank. A cropped tee shouldn’t inherit the chart from your standard crewneck.
2. Select garment or body measurements
Choose Garment if you’re measuring the finished item. Choose Body if your chart describes the person the garment is intended to fit.
Make this choice before entering your data, then check that every measurement name and value matches the selected method.
For tees and hoodies, garment measurements give shoppers a practical comparison with something they already own.
3. Set your units
Choose Use Inches or Use Centimeters. Switching units converts the entered measurements, with rounding.
For example, 20 inches equals 50.8 centimeters mathematically; the tool displays that value as 51 centimeters. Keep your original sample measurements for reference when preparing alternate versions.
4. Replace the examples and adjust the table
Enter your measurements for every size you sell. Rename size labels, remove unused columns, and use + Add Size or + Add Measurement when needed.
A useful T-shirt size chart usually includes chest width, body length, and sleeve length. The hoodie template identifies its sleeve measurement as Sleeve length (center back), so make sure your sample was measured that way.
Keep your method consistent across the size run. Changing measurement points halfway through makes the comparison unreliable.
5. Add context, review, and export
Expand Brand, product & fit (optional) to add identifying details. Fit choices include Slim, Regular, Relaxed, Oversized, and Custom.
Use the note to explain how to compare measurements. For example:
“Lay a similar shirt flat without stretching it. Compare its chest width and length with this chart.”
Check the preview, including the units and measurement type, then choose the download or copy option that suits your store.
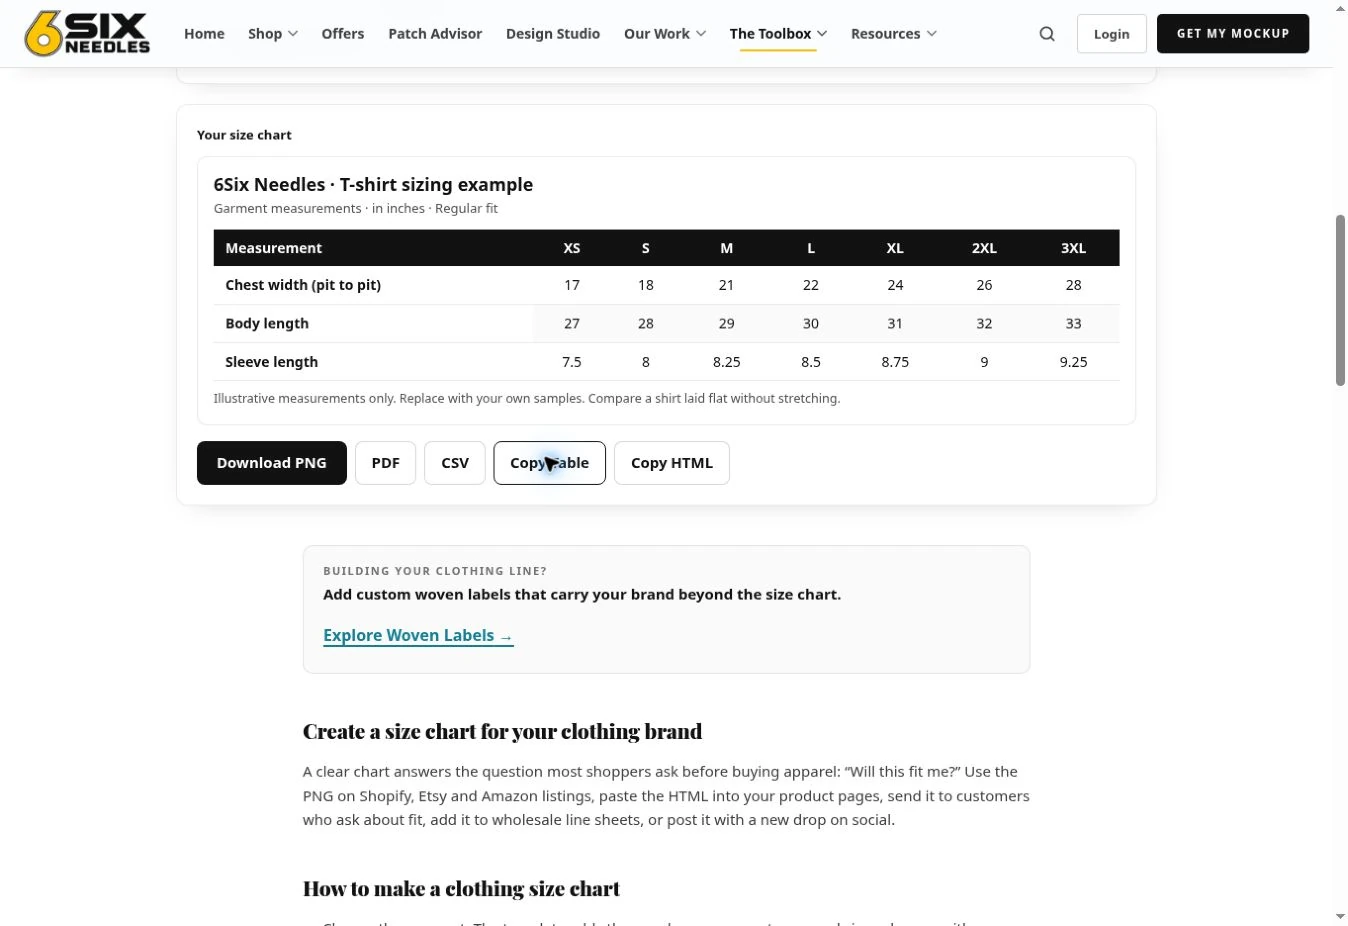
A chart created in the live tool using illustrative numbers. Replace them with verified measurements from your own samples.
Body measurements versus garment measurements: label the difference
This distinction deserves more than a tiny footnote.
Body measurements describe a person. A body chest measurement goes around the torso.
Garment measurements describe the clothing. A flat chest width measures straight across the laid-flat item.
- Body chest circumference
- What it describes: The wearer’s torso
- How to read it: Measured around the body
- Garment chest width
- What it describes: The shirt laid flat
- How to read it: Measured across one side, often called pit to pit
- Garment body length
- What it describes: The shirt’s length
- How to read it: Use the stated starting point and hem endpoint
A shirt measuring 20 inches across has an approximate garment chest circumference of 40 inches when that width is doubled. That does not automatically mean it comfortably fits a person with a 40-inch chest. Cut, stretch, and the room allowed for movement affect fit.
For a simple comparison, ask shoppers to measure a shirt they already like, using your stated method.
Lay it flat, smooth it gently, and avoid stretching it. If your method measures chest width one inch below the armholes, say that. For body length, specify whether you start at the highest shoulder point beside the neck.
Sleeve measurements need the same clarity. Shoulder seam to cuff and center back to cuff are different measurements.
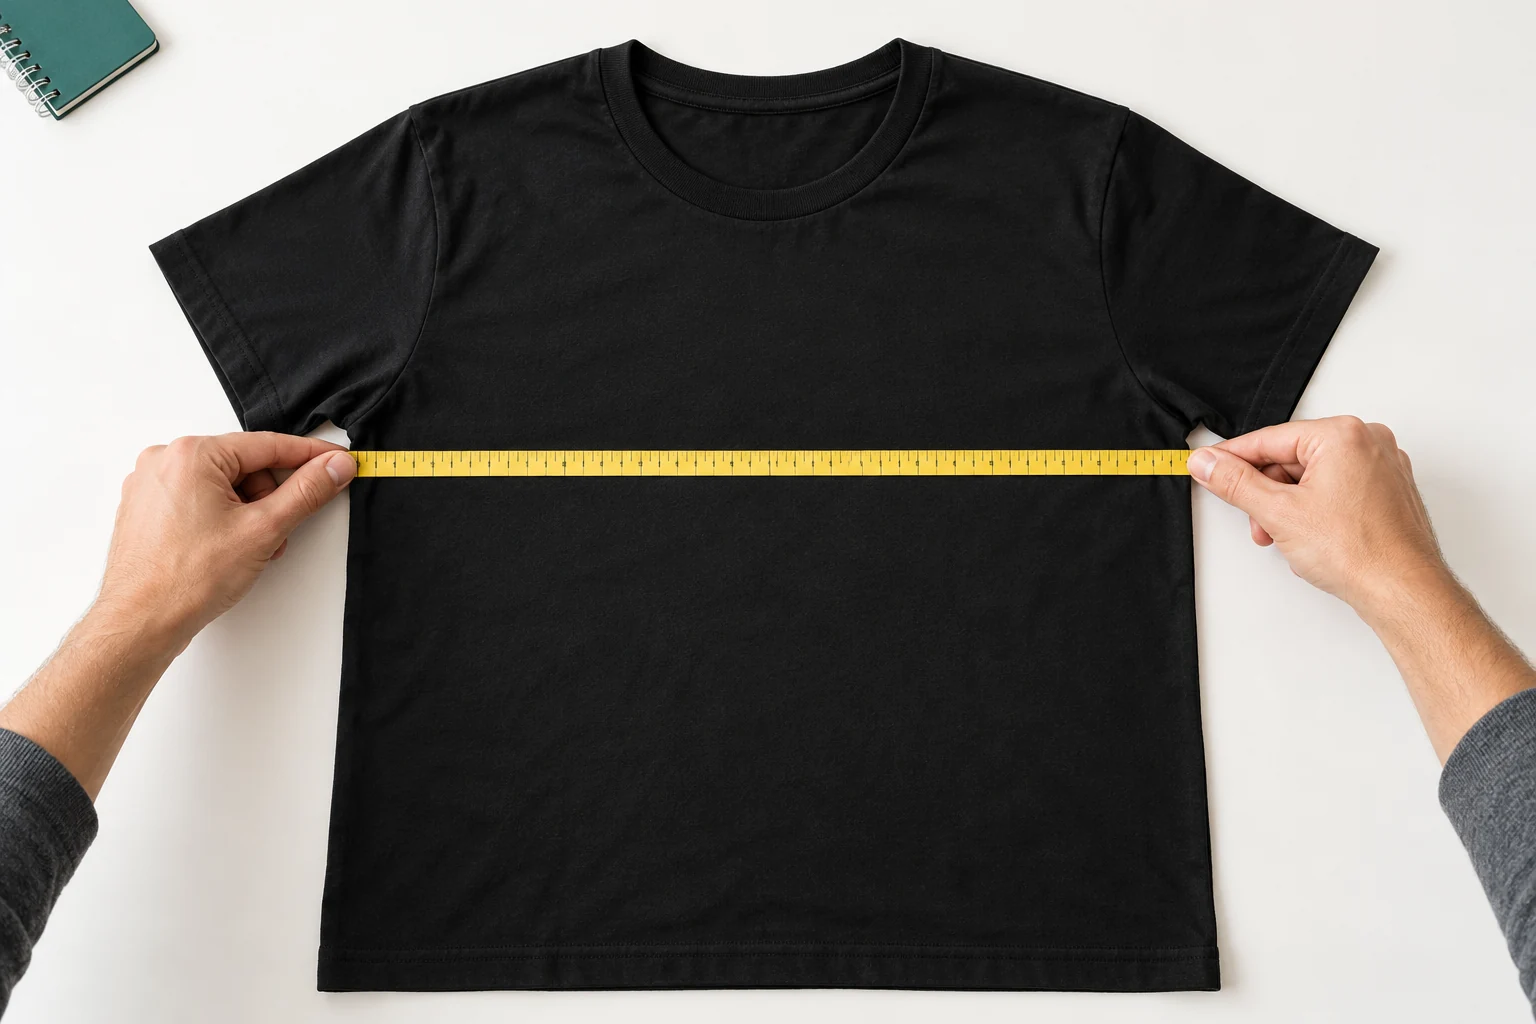
Measure straight across the laid-flat garment at the point specified in your chart, without stretching the fabric.
Make your T-shirt and hoodie examples product specific
Imagine you’re listing a regular tee and a relaxed hoodie. These are illustrative products, not universal sizing standards.
For the tee, show chest width, body length, and sleeve length. Explain where each measurement begins and ends. A shopper can then compare those dimensions with a favorite tee.
For the hoodie, use measurements from the actual hoodie sample, including its stated sleeve method. Describe the intended fit and account for how shoppers may wear it over another layer.
An oversized fit note should explain the design. Avoid automatically telling every shopper to size down. Someone buying for a roomy silhouette may want exactly that extra space.
The chart supplies dimensions. Your description explains what those dimensions mean for this garment.
How to use the US, UK, and EU clothing size converter
Suppose you’re browsing a women’s item with EU sizing and usually shop in US sizes.
- Open the sizing tool and select Convert a Size.
- Choose Women, Men, or Kids.
- Select the garment category where that control is available.
- Choose your starting system under From, then select the Size.
- Choose the destination under To and read the result and nearby-size table.
In the women’s converter, selecting US 8 and EU returns EU 40 as a rough equivalent. The same row shows UK 12.
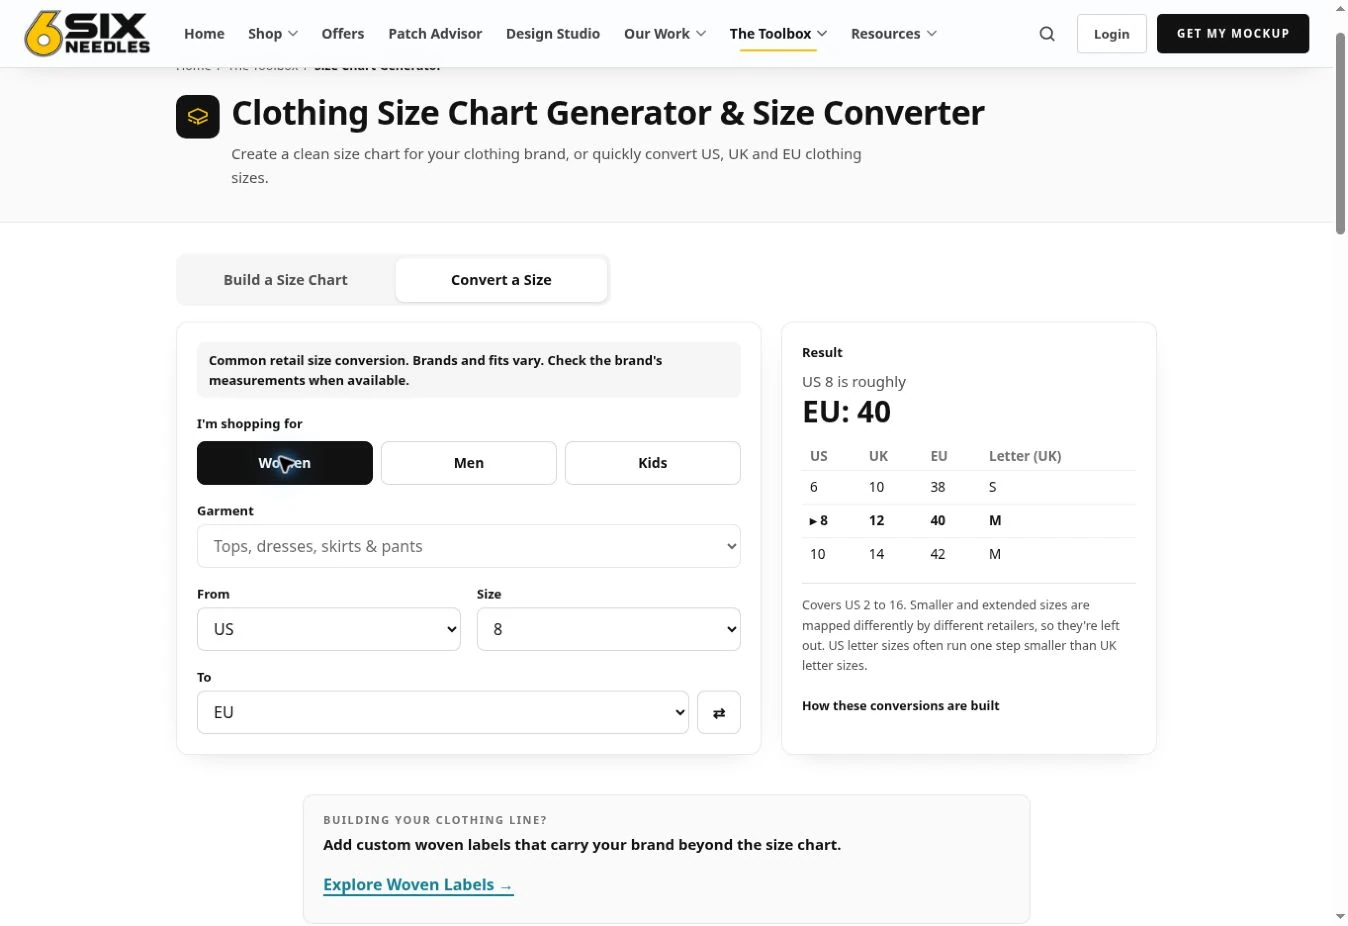
The live women’s converter maps US 8 to roughly EU 40 and UK 12. Check the specific garment’s measurements before ordering.
The women’s numeric reference currently covers US sizes 2 through 16. Smaller and extended sizes aren’t included in that mapping.
Treat any international conversion as guidance. It translates a size reference; it doesn’t inspect the garment or predict how you’ll feel wearing it. Compare the specific brand’s measurements before ordering.
A US clothing size chart becomes more useful when it identifies the product and measurement method alongside the size labels.
Put size information where shoppers need it
Once you’ve made the chart, make it easy to use.
- Place a clear “Size Chart” link near the size selector. Help shoppers find it while they’re choosing.
- Name the product or cut. Make it obvious which chart applies.
- State the measurement type and units. “Garment measurements in inches” answers two questions immediately.
- Include a measuring explanation. A short instruction beside the chart helps shoppers compare correctly.
- Check it on a phone. Labels and numbers should remain readable.
- Keep fit notes accurate. Add verified model sizing or fabric details when available.
If your audience uses both systems, prepare clearly labeled versions showing clothing measurements in inches and centimeters.
Keep size labels consistent with the product page, too. If you’re planning the finishing details for your line, explore our custom woven labels.
Frequently asked questions
Is the clothing size chart generator free?
Yes. The generator and converter are free to use, and you don’t need an account to get started.
Can I use it for a hoodie size chart?
Yes. Choose Hoodies & Sweatshirts, then replace the example values with measurements from your own samples. Confirm the sleeve measurement method before entering those numbers.
Does converting a size guarantee the garment will fit?
No. Conversions are reference points. The product’s actual measurements, fabric, cut, and your preferred fit still matter.
Can I reuse one chart across my whole store?
Only when the products genuinely share the same verified sizing specifications and measurement method. Different blanks or cuts need their own accurate information.
Give shoppers a clearer next step
Return to that shopper hovering over Medium.
Give them the measurements, explain how to compare, and put the chart within easy reach. They now have something concrete to work with.
If a size chart has been sitting on your launch checklist, start with one product today.