
Application Guide · 9 min read
How to Iron On a Patch Correctly: Step-by-Step Guide
By 6Six Needles Team · Published · Updated
Ironing on a patch can be simple. Problems start when the patch's application method or heat requirements do not match the garment underneath it.
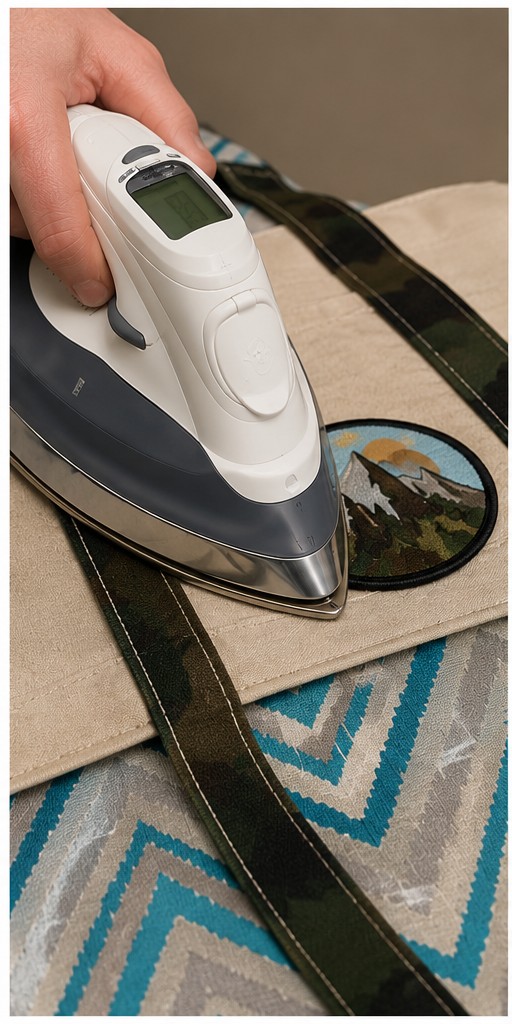
Before any heat
Confirm the backing, confirm the tool, then confirm the garment.
Heat-seal backing, household-iron approval, and garment heat tolerance are three separate questions. All three have to line up before the iron goes on.
Quick answer
To iron on a patch, first confirm that it has heat-seal backing and is approved for household-iron application. Check the garment's care instructions, work with clean and completely dry fabric, turn steam off unless the patch instructions say otherwise, use the recommended protective layer, and apply the specified heat, pressure, and time evenly.
Then let the bond set according to the patch instructions before checking the edges.
There is no single temperature or pressing time that works for every iron-on patch. Professional patch systems use different settings depending on the adhesive, construction, equipment, and application method.
Quick Steps
The short version. Each step is expanded further down the page.
- Check the care labelConfirm the garment can be ironed at all, and at what limit.
- Preheat the ironDry heat, steam off, within the garment's stated limit.
- Position the patchSet placement now. Sliding it later can smear adhesive.
- Cover the patchUse the pressing cloth or cover sheet specified for your patch.
- Press with firm pressureEven downward pressure across the whole patch, edges included.
- Press from the reverseIf the garment allows, press the inside face as well.
- Let it coolDo not move or flex the garment while the adhesive is setting.
- Check the edgesCorners should sit flat with no lift.
- Re-press briefly if neededOnly if the patch instructions allow it and the garment can take it.
Three Checks Before You Turn On the Iron
A quick check now can prevent a damaged patch or garment.
1. Is It Actually an Iron-On Patch?
Patch construction and backing are different things.
An embroidered, woven, PVC, chenille, leather, or printed patch may be made with different attachment options. An embroidered patch, for example, is not automatically iron-on.
If you are unsure what backing you ordered, check the order details instead of judging by appearance alone.
2. Is It Approved for a Household Iron?
This is a separate question.
A heat-activated backing does not automatically mean the patch is designed for application with any household iron.
Some professional heat-applied patches are specifically designed for heat-press application.
Before adding heat, confirm whether your patch is designed for:
- a household iron
- a professional heat press
- another specified application method
3. Can the Garment Handle the Required Heat?
Check the garment's care label before applying the patch.
For U.S. ASTM care symbols, use this customer-facing table:
| Care label | Garment-care limit |
|---|---|
| Low / one dot | 230°F / 110°C |
| Medium / two dots | 300°F / 150°C |
| High / three dots | 390°F / 200°C |
These are garment-care limits, not patch-application settings.
The patch still needs its own approved temperature, pressure, time, and application method.
If the garment says Do Not Iron, do not heat apply the patch.
If no usable ironing temperature is given, that does not give you permission to guess at a patch temperature.
If the patch requires conditions the garment cannot safely tolerate, choose another attachment method.
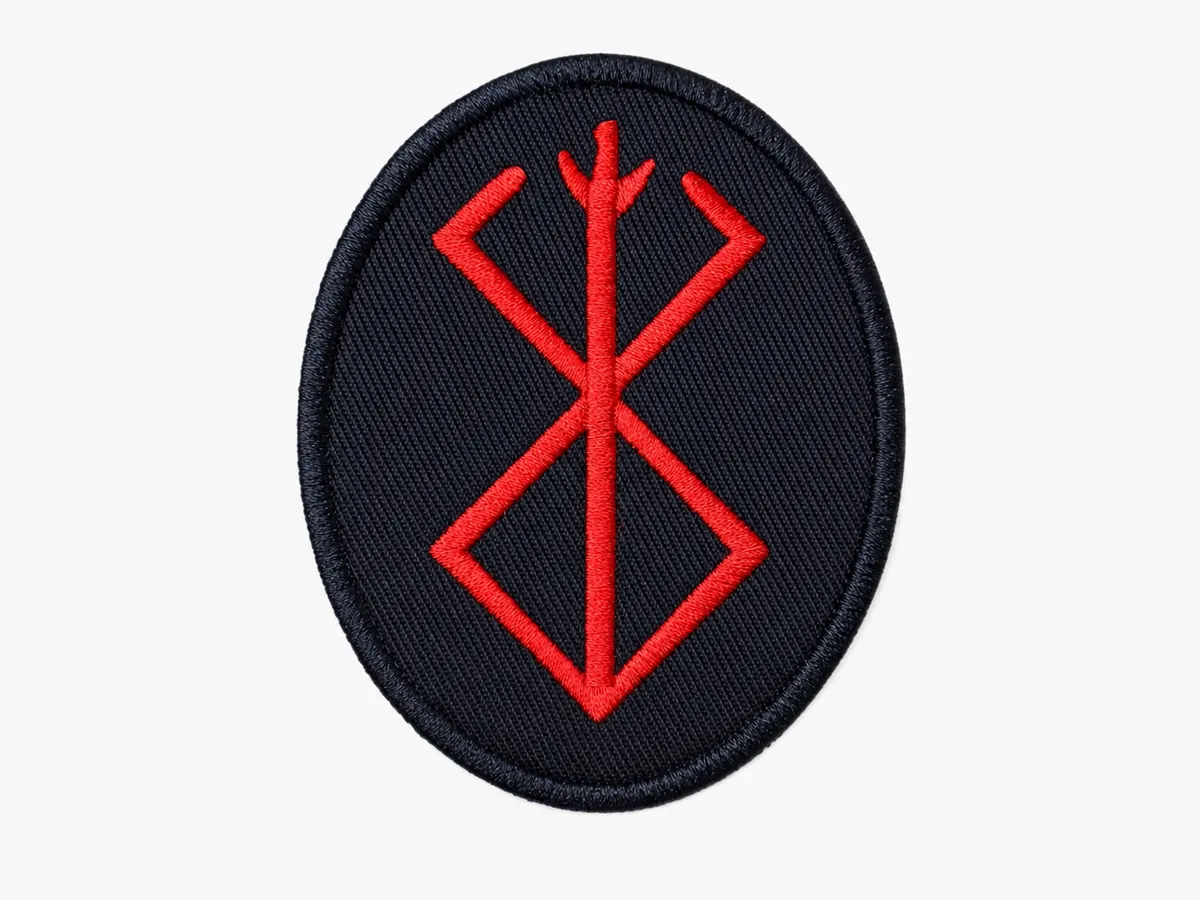
Patch front
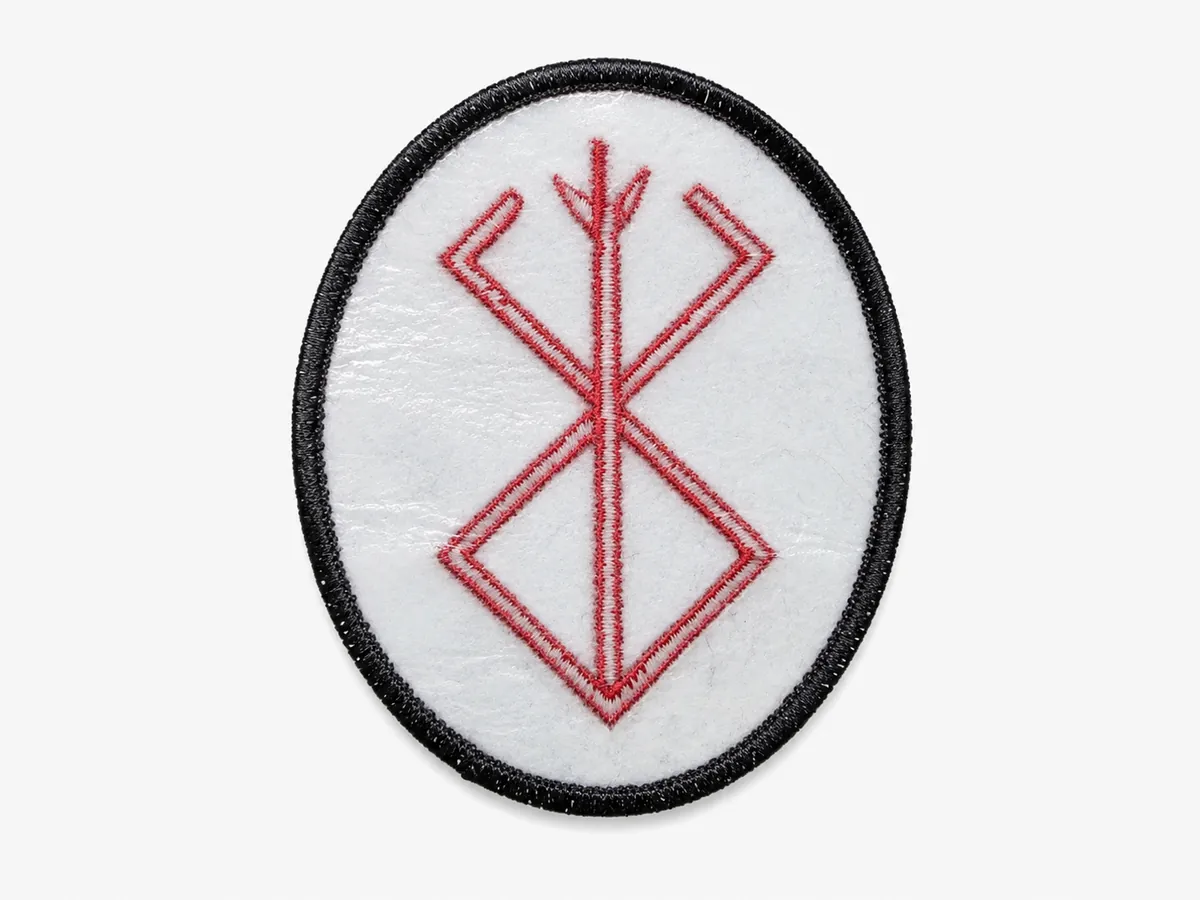
Heat-seal back
How to Iron On a Patch in 7 Steps
Confirm the Backing and Application Method
Before anything gets hot, verify two things:
- Is the backing heat activated?
- Is the patch approved for the tool you plan to use?
If you cannot confirm both, ask the supplier before continuing.
Check the Garment and Placement
Read the garment's care instructions and inspect the area where the patch will sit.
If the garment says Do Not Iron, stop there.
Also check what sits underneath the placement. Seams, pockets, zippers, buttons, padding, and hardware can prevent full contact between the patch and garment.
If you cannot establish that the garment can tolerate the required application conditions, do not guess.
Prepare the Application Area
The fabric should be:
- clean
- completely dry
- flat
Place it on a heat-safe surface that allows consistent contact and pressure.
If your patch instructions specify a particular application pad, base, or surface, use that setup instead of substituting your own.
Make sure nothing underneath the garment creates an uneven high spot.
Set the Correct Heat
Use the temperature or iron setting provided for your specific patch.
For household applications, dry heat with steam turned off is a common instruction, but the directions supplied with your patch take priority.
Do not default to a generic Cotton setting or a temperature such as 350°F or 400°F unless that exact setting is specified for your patch.
The same applies to a setting copied from another patch company.
A generic internet number is not a substitute for the instructions for the patch in your hand.
Position and Protect the Patch
Place the heat-seal backing against the garment and position the patch carefully.
Check the alignment before applying heat. Once the adhesive begins bonding, trying to slide the patch into a new position can create residue or an uneven bond.
Cover the patch with the protective material specified for that application system.
Different patch systems may use different cover sheets or application pads. Do not assume every pressing cloth, silicone pad, foam pad, or release material is interchangeable.
Apply the Required Heat, Pressure, and Time
A heat-seal bond depends on three variables:
All three matter.
But the correct value for each belongs to the specific patch and application system.
Apply firm, even pressure using the method supplied with your patch. Keep the patch from shifting and maintain consistent contact across the whole bonding area, including the edges.
Do not turn advice such as "always hold the iron still" or "always move it in circles" into a universal rule.
Follow the method supplied for the patch you actually have.
Let the Bond Set, Then Check It
Follow the patch's handling instructions before bending the garment or testing the edges.
Different adhesive systems can have different post-application requirements, so universal advice such as "always let it cool completely" is not appropriate for every product.
Once the bond has set as directed, gently inspect the perimeter.
The edges should sit evenly against the garment.
If an edge starts lifting, do not automatically add another five, ten, or thirty seconds of heat.
First check:
- Was the correct procedure used?
- Was contact even?
- Can the garment safely tolerate additional heat?
- Does the supplier allow a re-press?
Repeatedly overheating an unsuccessful application can turn a bonding problem into garment damage.
Should You Use Steam?
Usually not.
Heat-seal adhesives are activated by dry heat and pressure. Moisture sits between the patch and the fabric, cools the contact surface, and can leave you with a patch that looks applied but peels at the first wash.
Switch steam off, and empty the reservoir if your iron tends to spit. Keep working within the garment's stated ironing limit. Turning steam off does not raise how much heat the fabric can take.
The exception is a patch whose own instructions call for steam or a damp cloth. In that case, follow the patch instructions.
Why Use a Pressing Cloth?
A pressing cloth is a thin, clean barrier, such as a cotton tea towel, a plain cotton scrap, or the cover sheet supplied with your patch, placed between the iron and the patch.
It does two jobs:
- protects the patch face from flattening, glazing or scorching
- protects the garment from direct plate contact and shine
Use plain, undyed, lint-free cotton if you are improvising. Avoid printed towels, synthetics, and anything with a coating. Never press an iron directly onto a delicate patch surface such as PVC, chenille, foil or dimensional embroidery. Those need the cover material specified for the product, or professional application.
Pressing From the Front and the Back
The reliable sequence is front first, then reverse.
Press from the front to tack the patch in place and lock the position. Then, if the garment can be turned inside out and laid flat, press the same area from the reverse side.
Reverse-side heat travels through the fabric into the adhesive layer from underneath, which helps the bond set evenly right out to the edges without adding more heat to the patch face. That matters most on thicker items like denim, canvas and hoodies.
Keep total heat exposure sensible. Two controlled passes beat one long overheated one, and no amount of extra heat fixes a fabric that is not compatible in the first place.
Why There Is No Universal Iron-On Patch Temperature
A single iron-on temperature would only make sense if every patch used the same adhesive, construction, garment, pressure, and equipment.
They do not.
Even within professional embroidered-patch systems, application procedures change with the equipment being used.
The practical rule is much simpler:
Use the settings required by your patch only when those settings are also safe for the garment.
If those requirements do not work together, use another attachment method.
Do not solve a compatibility problem by simply turning the heat higher.
Which Fabrics Work With Iron-On Patches?
There is no universal yes-or-no fabric list.
The garment has to tolerate the application process, and the adhesive backing has to be compatible with the surface.
Cotton / Denim
Often straightforward, but still check the garment care instructions, finishes, seams, and placement.
Polyester
Commonly heat decorated, but heat tolerance varies by garment. Check the actual care instructions.
Nylon / Performance
Verify compatibility first. Some materials are heat sensitive, and coatings or finishes may affect bonding.
Waterproof / Coated
Use extra caution. Coatings, membranes, laminates, and limited heat tolerance can make heat application unsuitable.
Stretch Fabrics
Consider movement as well as heat. Repeated stretching can place mechanical stress on a rigid patch area.
Leather / Specialty
Follow product-specific guidance. Do not assume direct household-iron heat is appropriate.
With leather, PVC, chenille, dimensional embroidery, and other specialty constructions, having a heat-seal backing does not automatically mean direct household-iron contact is appropriate.
Not sure iron-on is right for your garment? Compare Iron-On, Sew-On & Hook-and-Loop Backing before ordering.
Garment-by-Garment Guidance
Fabric is only half the picture. The shape of the item, what sits under the placement, and how hard it gets worn all change the answer.
Denim
One of the most forgiving surfaces: dense, flat and heat tolerant. Press firmly and give the edges extra attention, since heavy denim weave can hold the patch slightly proud. Sewing reinforcement is optional.
Cotton tees and totes
Generally straightforward. Thin cotton heats fast, so watch for shine or scorching and always use a cover cloth. Work on a firm surface, not a soft bed or couch.
Polyester and blends
Often possible, but heat tolerance is much lower than cotton. Use the lowest setting that still meets the patch's requirement, keep dwell short, and stop immediately if the fabric glazes.
Jackets and outerwear
Check for coatings, membranes, insulation and quilting. Padding underneath prevents even pressure, so place a firm board inside the shell where possible. Sewing is often the safer finish.
Hoodies and sweatshirts
Fleece backing compresses under the iron, which can leave a flattened halo. Press from the reverse side where you can, and keep the pressure even rather than heavy.
Hats and caps
The hardest surface for a household iron. Curved crowns and structured front panels make full contact difficult; heat positioning followed by stitching is usually more reliable.
Backpacks and canvas
Canvas takes heat well, but bags have seams, straps, webbing and coated linings. Isolate a flat single layer, or sew instead when the panel cannot be laid flat.
Stretch and performance fabrics
A rigid patch on a stretching panel puts constant mechanical load on the bond. Many performance fabrics are also heat sensitive. Sewing with a stretch-friendly placement is usually better.
Leather and faux leather
Do not assume direct iron contact is safe. Real leather can scorch and faux leather can melt or gloss permanently. Follow product-specific guidance, or sew.
Putting a patch on a cap? Check the right patch size for hats first, or see your patch at actual size before you commit to a placement.
What You Should Not Iron
Some materials melt, scorch, glaze, warp or delaminate under a household iron. Check the care label first, and treat these as sew-on cases unless the manufacturer says otherwise:
- nylon and other low-melt synthetics
- vinyl or plastic-coated surfaces
- waterproof and breathable membranes
- delicate synthetics, silk-like fabrics and sheer panels
- leather and faux leather without product-specific guidance
- heat-sensitive performance and reflective fabrics
- anything labelled Do Not Iron
If in doubt, test on an inside seam allowance first, or skip the heat and sew.
Household Iron vs. Heat Press
Household Iron
A household iron can work well when the patch is designed for household application.
Its limitations include:
- less exact temperature control
- pressure that depends on the person applying it
- a smaller contact area
- more difficulty maintaining even contact on large or curved placements
Professional Heat Press
A heat press gives a decorator more repeatable control over:
- temperature
- pressure
- dwell time
- platen contact
But it still needs the correct settings for the patch being applied.
Professional equipment does not make a guessed temperature safe.
What About Hats?
Hats are the awkward one.
The curved crown makes full contact harder to maintain with a flat household iron, especially around seams.
Professional decorators use shaped cap presses for better contact and repeatability.
If you cannot create safe, even contact across the patch, professional application or another attachment method is the better choice.
Troubleshooting an Iron-On Patch
Won't Stick
Possible causes include:
- the patch is not actually heat-seal
- it requires professional application
- incorrect application settings
- uneven pressure
- incomplete contact
- an incompatible garment or surface
Check the patch instructions before increasing the heat.
Edges Lifting
Uneven pressure or incomplete contact around the perimeter can leave part of the patch under-applied.
Look for seams, curved areas, pockets, or uneven surfaces beneath the patch.
Re-press only if the approved instructions allow it and the garment can safely tolerate additional heat.
Partial Bond
The entire patch may not have received the same contact.
This is more likely when the patch is large, the item is curved, or the placement sits over seams or hardware.
Correct the setup before adding more heat.
Warning: Fabric Changing
Stop applying heat.
The fabric is showing signs of heat or pressure stress.
Let it cool and do not continue until you have confirmed a safe application method.
Keeps Coming Loose
If the application keeps failing after you follow the correct procedure, the garment, adhesive, placement, or intended use may not be a good match.
For workwear, frequent laundering, or heavy use, stitching can provide a more reliable mechanical attachment.
After You Apply the Patch
Follow both the garment care instructions and the care instructions supplied with the patch.
First-wash timing, wash temperature, drying method, and expected durability can vary by adhesive system.
Do not assume every heat-seal patch uses the same:
- 24-hour or 48-hour waiting period
- cold-wash requirement
- dryer setting
- wash-cycle rating
Follow the information for your specific patch.
Washing Clothes With Iron-On Patches
Where your patch instructions do not say otherwise, these habits extend the life of the bond:
- let the garment rest before the first wash if the patch instructions require it
- turn the garment inside out so the patch face is not abraded
- use a gentle cycle and the coolest wash the garment allows
- skip high-heat tumble drying, which is the most common cause of edge lift
- air dry flat where practical
- check the corners after each of the first few washes
If an edge lifts more than once after correct application, stitch the perimeter rather than re-pressing repeatedly.
Can You Sew Over an Iron-On Patch?
Yes, in most cases, and it is what we recommend whenever the patch has to last.
The heat does the positioning: it holds the patch exactly where you want it so nothing shifts while you stitch. The stitching then adds mechanical security that adhesive alone cannot match. Sew close to the outer border, either by hand or with a machine, and keep the stitch line inside the patch edge.
This combination is standard for workwear, jackets, caps, team kits, and anything laundered often. Step-by-step stitches, machine settings, and fabric-by-fabric tips are in how to sew on a patch.
When to Sew Instead of Ironing
- the garment cannot safely tolerate the required heat
- the placement is curved or structured, like a cap front or a padded shell
- the item sees heavy-duty or industrial use
- the patch has already lifted once after a correct application
- the customer wants maximum durability with no adhesive in the equation
Not sure which backing to order in the first place? Compare iron-on, sew-on and hook-and-loop backing or let the Patch Advisor narrow it down.
Frequently Asked Questions
What Temperature Should I Use to Iron On a Patch?
Use the temperature specified for your patch's heat-seal backing only if the garment can safely tolerate it. There is no single universal temperature because adhesives, patch constructions, equipment, and garments vary. In practice: the hottest setting the garment can safely tolerate, without steam.
How Long Should I Press an Iron-On Patch?
Use the dwell time supplied for the specific patch and application method. Do not substitute a generic pressing time from another patch company or another heat-transfer product.
Can I Iron a Patch Onto Polyester?
Often, yes, but the patch's required application settings must be compatible with that particular polyester garment. Check the garment care instructions instead of assuming every polyester item has the same heat tolerance.
Can I Iron a Patch Onto Denim?
Denim is one of the best surfaces for iron-on backing: it is dense, flat and heat tolerant. Press firmly, give the edges extra attention, and let the bond cool fully before wearing the garment.
Can I Iron On a Patch Without a Pressing Cloth?
It is not recommended. Direct iron contact can flatten, glaze or scorch the patch face and mark the garment. A clean cotton tea towel or plain cotton scrap works if you do not have a dedicated pressing cloth.
Can I Use Steam?
Usually no. Dry heat is preferred, because moisture can interfere with adhesive activation. Turn steam off and empty the reservoir unless the patch instructions specifically say otherwise.
Why Isn't My Iron-On Patch Sticking?
Possible causes include the wrong backing, a patch that requires professional equipment, insufficient or uneven pressure, incomplete contact, an incompatible garment, or application settings that do not match the adhesive system. Check those factors before adding more heat.
Why Does My Patch Keep Peeling?
Repeated peeling usually points to too little heat or pressure, steam during application, a coated or heat-limited fabric, the patch being moved before it cooled, or high-heat washing and tumble drying. If it lifts more than once, stitch the perimeter.
Can I Iron a Patch Onto a Hat?
Sometimes. The main challenge is creating even contact across the curved crown. If a household iron cannot contact the full patch safely and evenly, professional cap-press application or another attachment method may be more reliable.
Can You Sew Over an Iron-On Patch?
Yes, in most cases. Heat sets the placement, and a stitched border adds mechanical security. This combination is the standard for workwear, jackets, caps and anything laundered often.
Can I Use a Heat Press Instead of an Iron?
Yes, when the patch is rated for it. A press gives more repeatable temperature, pressure and dwell, but it still needs the correct settings for that patch. Professional equipment does not make a guessed temperature safe.
Can You Iron On an Embroidered Patch?
Only if that embroidered patch was made with heat-seal backing. Embroidery is the construction, not the backing. Plenty of embroidered patches are sew-on or hook-and-loop only.
Can Iron-On Patches Be Washed?
Many heat-seal patch systems are intended for washable garments, but wash and drying limits vary. Follow the patch-specific care guidance and the garment care label rather than assuming one universal laundering rule.
Ordering Patches for a Specific Garment?
Most application problems are easier to prevent before production than after the patch reaches the ironing board.
Tell us what your patches are going on and how they'll be used. We'll help you choose a patch construction and backing that make sense for the job.
Full-color digital mockup within 24 hours.
No payment until you approve the mockup.
Sources & application references
- STAHLS' material application instructions
- Transfer Express heat-applied transfer application instructions
- FTC Care Labeling Rule (16 CFR Part 423) and ASTM D5489 care-symbol guidance
Planning a run of custom patches? Choose the backing before production, not after.